
A) Download the xml file.
Step 1: Download the xml file for the form. Download here
B) Import the xml file to your site.

Step 1: Log in to your site and go to the Dashboard.
Step 2: Go to Forms and select Import/ Export.
Step 3: Select Import Forms. Click “Choose File” button.
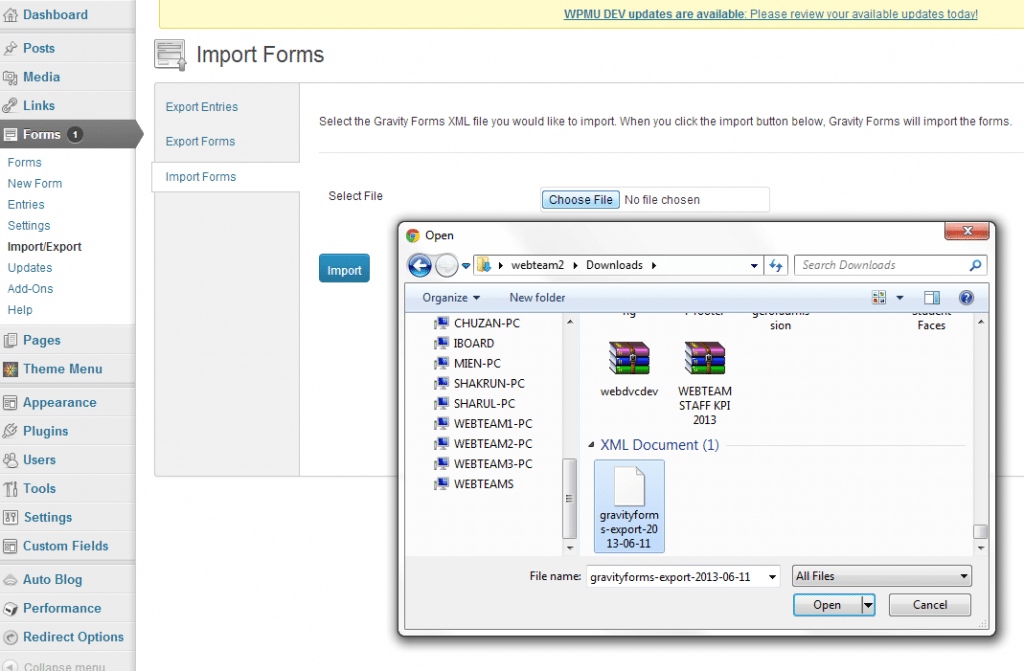
Step 4: Choose the downloaded xml file from your computer. Then, click Import button.
C) Embed your file into the Page.
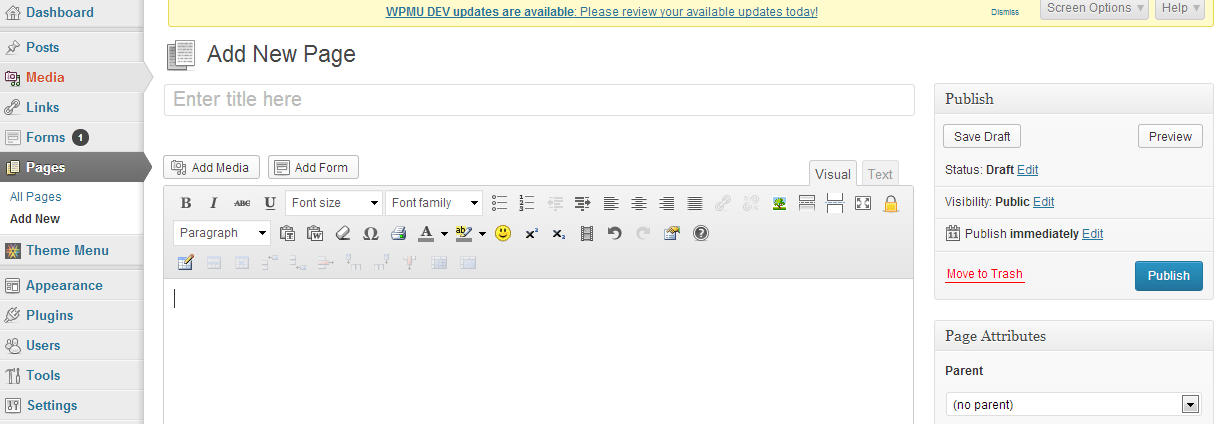
Step 1: Go to Dashboard, and select Pages.
Step 2: Click Add New. Key in your page title.
Step 3: Click Add Form button.
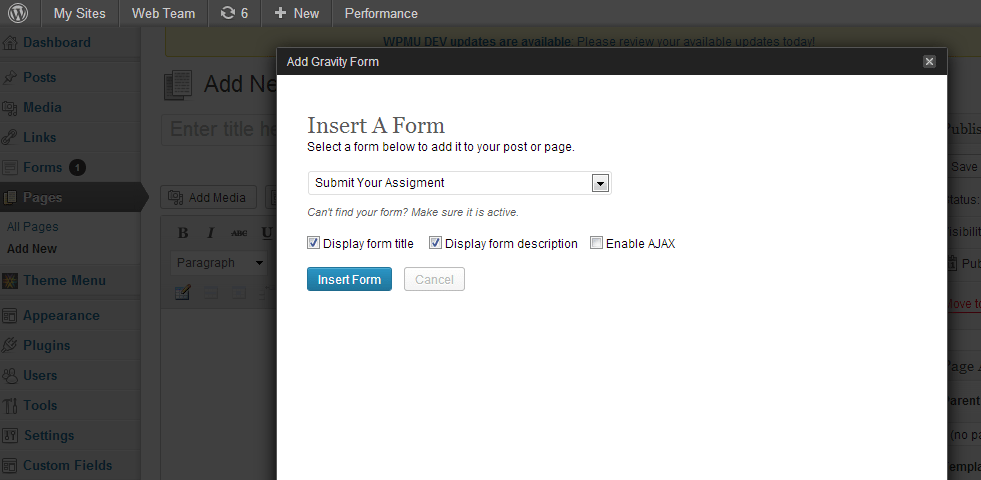
Step 4: After clicking Add Form button, you need to select which form did you will embed into the page. In this case, choose Submit Your Assignment form.
Step 5: Click Insert Form button.
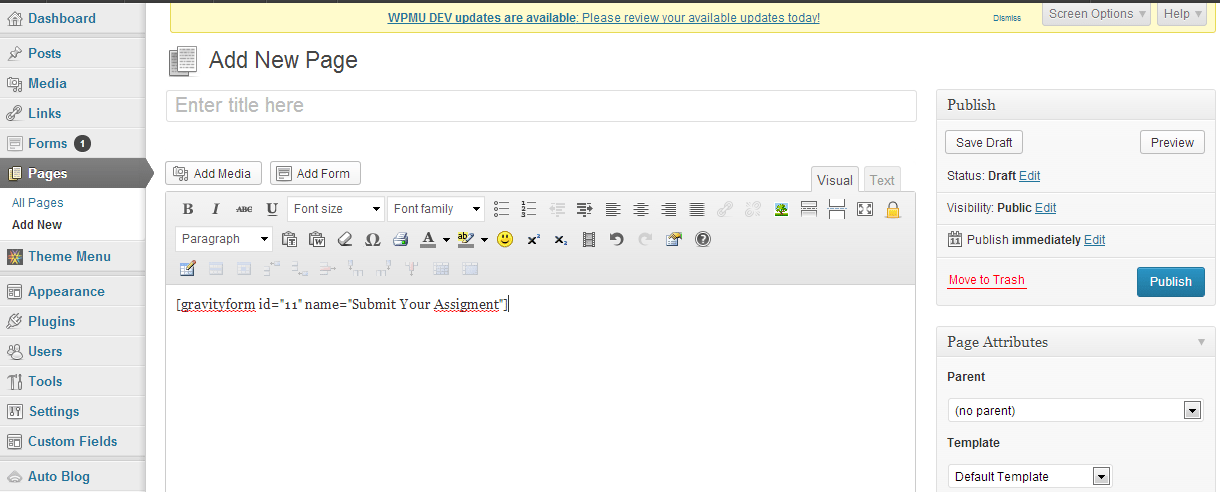
Step 6: Add any related information or instruction at the page content (before the generated embed form code).
Step 7: Choose the page parent at Page Attributes section on your right side. (If any).
Step 8: Click Publish button.
D) Put your form at the sidebar.

To put your form at the sidebar (see image above) you need to:-

Step 1: Go to Dashboard and select Appearance.
Step 2: Select Widgets. Drag the Text widget and drop it at the Primary Sidebar section.
Step 3: Put your widget title and basic HTML code to enable the sidebar linked to your page (refer image above).
Step 4: Click Save button.
E) Set up your form.

Step 1: Go to Posts and select Categories.
Step 2: Key in your category title*, slug (if necessary), choose the parent category (if any). *Category title would be as same as the form title.
Step 3: Click Add New Category button.
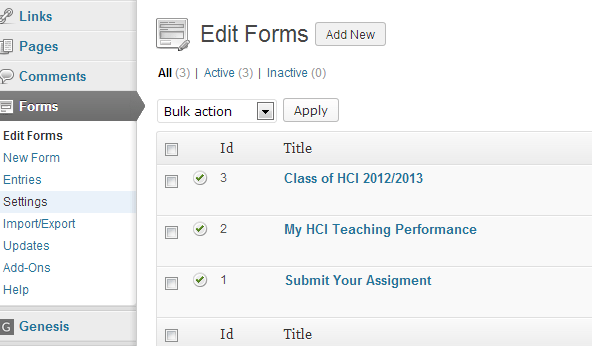
Step 4: Go to Dashboard and select Forms.
Step 5: Select “Edit Forms” and choose Class of HCI 2012/2013.
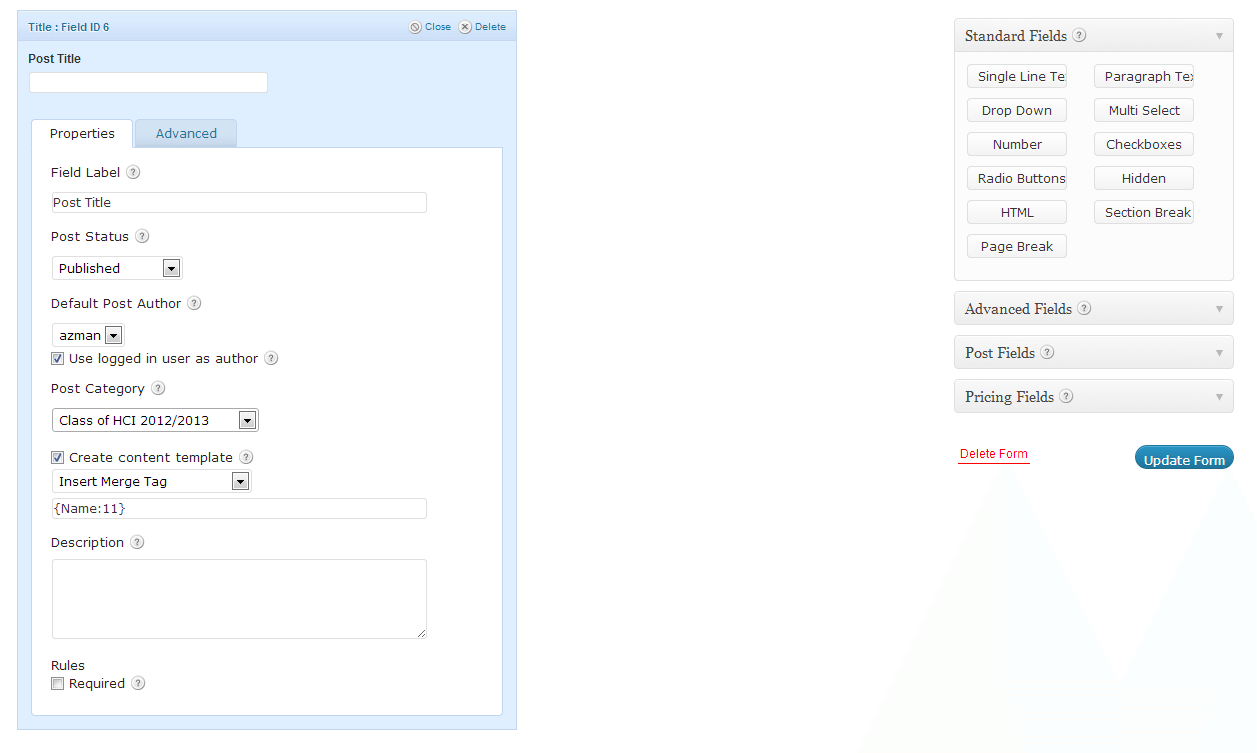
Step 6: After clicking the edit form button, find Post title.
Step 7: At Post Category drop down menu, select category that have you create before. Follow other setting as shown in the image above.
Step 8: Click Update Form button.
D) Put your form at the sidebar.
To put your form at the sidebar (see image above) you need to:-
Step 1: Go to Dashboard and select Appearance.
Step 2: Select Widgets. Drag the Text widget and drop it at the Primary Sidebar section.
Step 3: Put your widget title and basic HTML code to enable the sidebar linked to your page (refer image above).
Step 4: Click Save button.
E) Set up your form.
Step 1: Go to Posts and select Categories.
Step 2: Key in your category title*, slug (if necessary), choose the parent category (if any). *Category title would be as same as the form title.
Step 3: Click Add New Category button.
Step 4: Go to Dashboard and select Forms.
Step 5: Select “Edit Forms” and choose Submit Your Assignmnet.
Step 6: After clicking the edit form button, find Post title.
Step 7: At Post Category drop down menu, select category that have you create before. Follow other setting as shown in the image above.
Step 8: Click Update Form button.